
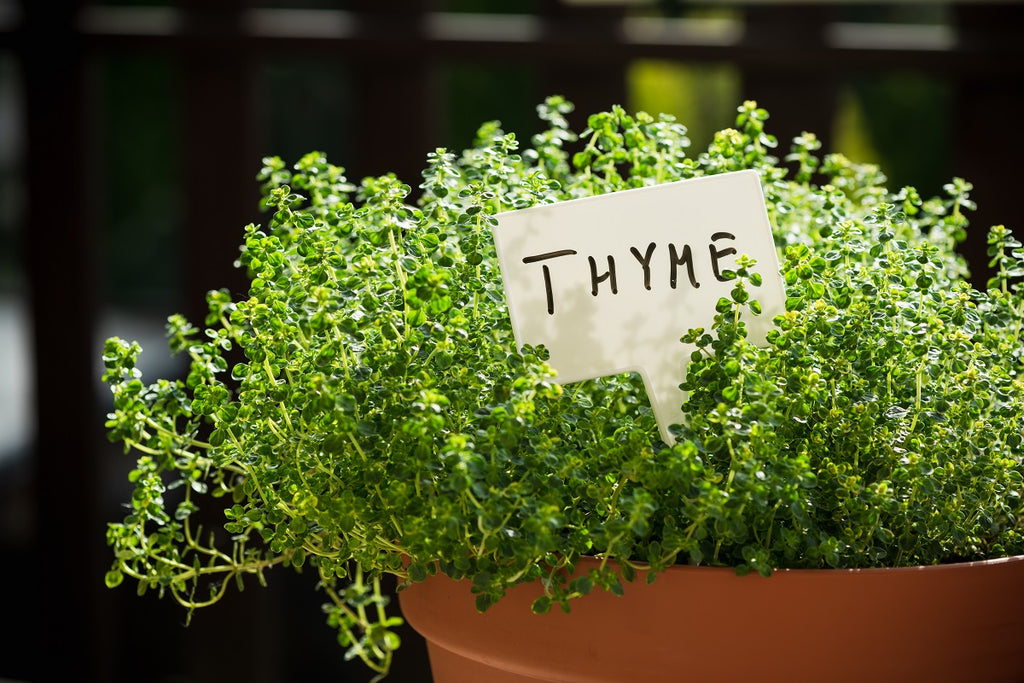

How to Grow Thyme from Seed in South Africa
Learn how to sow, grow and harvest the two common-thyme selections available from GARDENING.co.za. Summer Thyme gives you a greyer, narrower-leaved, more pungent culinary plant, while Winter Thyme grows denser with broader dark-green leaves. Both are perennial Thymus vulgaris; their names describe useful commercial selections, not crops that live for only one season.
Start with the detail that matters most: thyme seed is tiny and needs light near the surface to germinate. Press it onto moist seedling mix and leave it uncovered, or dust it with no more than 1 mm of fine vermiculite. Do not bury it 5 mm deep.
Quick Grow Facts
Summer Thyme
Identity and seedThymus vulgaris, commercial Summer selection; raw seed
SowingSurface-sow in light; no pretreatment; 18–21°C
GerminationUsually 14–21 days with steady temperature and moisture
Final spacing20–25 cm; 15–20 cm in a closely managed cut row
Growth form and outcomeFine, slightly upright grey-green perennial, about 30–45 cm; light harvests can begin around 90–95 days in good conditions
Winter Thyme
Identity and seedThymus vulgaris, commercial Winter selection; raw seed
SowingSurface-sow in light; no pretreatment; 18–21°C
GerminationUsually 14–21 days in ideal conditions; allow the packet's full 14–28-day window
Final spacing20–25 cm; the current packet specifies 22 cm
Growth form and outcomeDense, robust dark-green perennial, about 30–45 cm; the current packet budgets 180–200 days to harvest
Tray sowing is the most reliable home method for both selections. Direct sowing is possible in a fine, weed-free bed, but the tiny seed is easier to bury, wash away or dry out outdoors.
Summer Thyme: fine leaves and stronger flavour
Summer Thyme is the more tender-feeling culinary selection. It has narrower, greyer-green leaves, slightly longer internodes and a more pungent, earthy flavour than the robust Winter type. Grow it for fresh or dried leaves in sunny herb beds, rockeries and containers. The product is raw seed in a 10 g pack; no named breeder series or subspecies is confirmed for this lot.
Winter Thyme: dense, robust growth
Winter Thyme is the denser, broader-leaved commercial selection of Thymus vulgaris. Its strong branching suits a compact herb border or low groundcover, and the dark-green leaves have the familiar earthy thyme flavour. The current packet calls for autumn sowing and allows 14–28 days for germination and 180–200 days to harvest. Use that harvest figure for planning, but correct the packet's 0.5 cm depth by surface-sowing for light.
When to sow in South Africa
Choose a window when you can keep the seed zone close to 18–21°C. Spring is the simplest starting point in most frost districts. In frost-free gardens, a mild autumn sowing can establish plants before summer heat, provided the tray and young plants are protected from prolonged rain and waterlogging.
- Winter-rainfall Western Cape: sow under cover from late winter into spring, or make a protected early-autumn sowing. Use a raised bed, gritty container mix or rain-sheltered pot so winter rain cannot saturate the crown.
- Frost-prone interior: start trays in bright protection in late winter, harden seedlings gradually and plant out after severe frost. Keep autumn-sown seedlings in pots under protection through their first winter.
- Humid coast and KZN Midlands: favour the drier, milder months. Give morning sun, excellent airflow and 25–30 cm spacing where humidity is persistent; avoid the hottest, wettest part of summer for establishment.
- Hot-dry or subtropical interior: sow in late summer to autumn or late winter when trays will stay near 18–21°C. Protect trays from baking afternoon sun, and give established plants light afternoon shade during extreme heat.
How to sow thyme seed
- Fill a clean cell tray with fine, sterile, free-draining seedling mix. Moisten it before sowing and let excess water drain.
- Scatter the tiny raw seed thinly, or place a small pinch per cell. Press it firmly onto the surface. Leave it uncovered, or use only a translucent dusting of fine vermiculite no deeper than 1 mm.
- Place the tray in bright indirect light at 18–21°C. A clear cover can slow drying, but vent it daily and remove it as soon as seedlings appear.
- Keep the surface evenly moist with a fine mist or bottom watering. It must never become waterlogged, and it must not dry hard between waterings.
- Expect Summer Thyme in about 14–21 days. Winter Thyme often emerges in the same ideal window, but wait the full 28 days before judging the sowing.
- After emergence, provide strong light and moving air. Thin crowded cells to one or two sturdy seedlings.
- Move seedlings into individual pots when they have about four true leaves and can be handled without pulling the stem.
- Harden plants for 7–10 days by gradually increasing outdoor sun and wind. Plant with the crown at soil level.
Pretreatment: neither selection needs soaking, chilling, scarification or another pretreatment. Sow the seed dry. “Raw seed” describes the unpelleted sale form; it does not prove that a lot is food-grade or untreated.
Spacing and growth form
For a home herb bed, space both selections 20–25 cm apart; the current Winter packet's 22 cm fits this range. Use 25–30 cm in humid gardens for better airflow. A closely managed cut row can use 15–20 cm between plants with 30–45 cm between rows, but wider spacing makes watering, pruning and disease inspection easier.
Expect low, woody perennial subshrubs around 30–45 cm high. Summer Thyme is finer and a little more open; Winter Thyme is denser and more branched. Neither needs support. Once established, pinch only the soft growing tips to encourage branching—never remove all green growth.
Soil, water, feeding and airflow
- Light: give at least six hours of sun. In very hot districts, morning sun with light afternoon shade prevents scorching and heat stress.
- Soil: use light, gritty, sharply drained soil. Thyme tolerates a broad pH range of about 5–8, but it performs best where water leaves the root zone quickly.
- Water: keep transplants evenly moist while roots establish. Thereafter water deeply, then let the upper soil dry. Never leave a saucer full of water under a pot.
- Feeding: mix in modest compost before planting or use a light, balanced feed according to the label. Avoid heavy nitrogen, which produces soft growth and weaker flavour.
- Airflow: keep mulch away from the crown, remove dead interior stems and widen spacing in humid sites.
Pruning and harvest
Take only light sprig harvests while plants are young. Under good warm conditions, Summer Thyme may give a first modest cut from about 90–95 days after sowing. The exact Winter packet gives a more conservative 180–200-day planning window. In both cases, wait until plants are well branched and never strip more than one-third at once.
Flavour is strongest just before flowers open. Cut above leafy green growth in the morning after dew has dried. After flowering, trim lightly to keep plants compact, but never cut back into bare old wood because it may not reshoot. Divide or replace plants when they become very woody and sparse, often after three to four years.
Safe pest and disease care
Healthy thyme has few pest problems, but inspect shoot tips and leaf undersides for aphids, whitefly, scale and spider mites. Start with pruning badly affected growth and a firm water spray. If more control is needed, use only an insecticidal soap, horticultural oil or other product labelled in South Africa for the pest and edible herbs; follow the label, test a small area and never spray open flowers while bees are visiting.
Botrytis, leaf spots and Rhizoctonia root rot become more likely in wet, stagnant conditions. Water at soil level early in the day, remove diseased material, improve spacing and drainage, and discard plants whose crowns are soft and rotting. Do not compost badly diseased plants.
Troubleshooting germination and establishment
- No seedlings: seed was buried too deeply, the surface dried out, the tray was colder than 18°C or seed is old. Resow on the surface and keep it evenly moist in light.
- Patchy, late emergence: temperature or moisture varied across the tray. Rotate the tray, bottom-water evenly and allow Winter Thyme the full 28 days.
- Seedlings collapse at soil level: the mix is saturated, seedlings are crowded or airflow is poor. Use clean free-draining mix, thin promptly and vent covers.
- Seedlings stretch and fall over: light is too weak after emergence. Move them into stronger light without suddenly scorching them.
- Plants fail after transplanting: they were not hardened, the crown was buried, roots were disturbed or soil stayed wet. Replant at soil level and correct drainage.
- Leaves yellow and stems blacken: suspect waterlogged roots or crown rot rather than hunger. Stop watering, inspect drainage and replace rotted plants.
- Plants are soft with weak aroma: reduce nitrogen, increase sun gradually and let established soil dry between deep waterings.
- Old plants are bare in the centre: light trimming came too late or plants were cut into old wood. Take cuttings from healthy green tips or replace the plant.
Edibility and seed safety
The leaves and small flowers of both listed Thymus vulgaris selections are culinary when grown without unsuitable crop-protection residues; wash them before use. Do not eat seed from the packet or use it for sprouts, microgreens or animal feed. Follow any treatment warning on the delivered lot, because “raw seed” does not by itself confirm untreated seed.